Vehicles after change point in 1982 DISASSEMBLING/ASSEMBLING TRANSMISSION Remove transmission 24 00 022. Remove torque converter 24 40 001. Mount transmission on Special Tool 24 0 150 in conjunction with an assembly stand. Important! Screw in bolts only finger tight to prevent damaging transmission case.  24 00 022 24 00 022 24 40 001 24 40 001
|  |
A) Disassembling: Unscrew oil sump. Remove oil filter screw. | 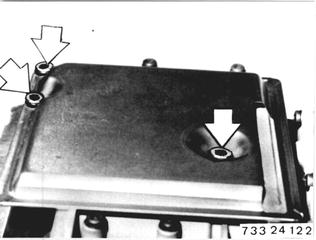 |
Take off valve body. Unscrew Torx bolts with Special Tool 00 2 100. Important! Only unscrew bolts with 12 mm size head (A). The transmission wire harness socket has to be removed for the version with electronic/hydr. control (EH). | 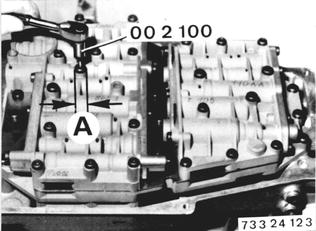 |
Lift out eight circlips, Remove eight springs. Installation: Install longer springs facing output end. EH Transmission: Only remove two circlips and two springs from cylinder F (output end). | 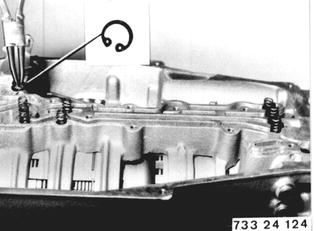 |
Pull out eight sealing sleeves with Special Tool 24 0 050. EH Transmission: Only remove two selaing sleeves from cylinder F (output end). | 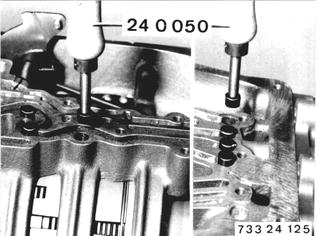 |
Important! The lubricating oil feed to the cylinder F gear set was improved and introduced gradually since 7.85. Circlip (2), spring (3) and sealing sleeve (4) must also be removed at bore (1). Pull sealing sleeve (4) out of the bore with a M 6 x 65 screw. Don´t cant the screw. | 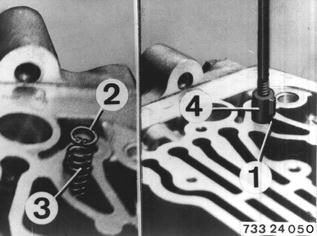 |
Lift off lockplate. Hold output flange with Special Tool 23 0 020. Unscrew collar nut with Special Tool 23 1 210. Pull off output flange. | 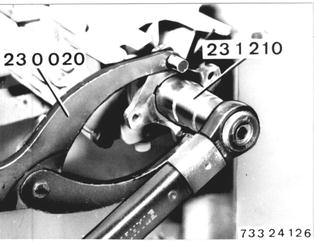 |
Unscrew transmission extension. Installation: Replace gasket. | 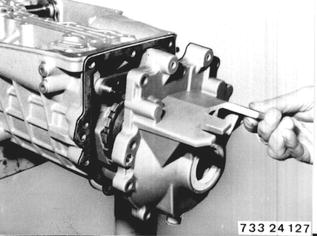 |
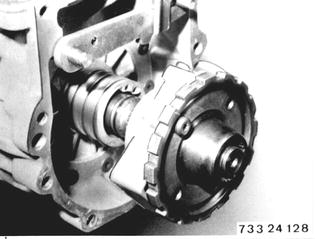
Pull off parking lock gear and governor. Important! Pull off parking lock gear with special tool, if necessary (see 24 32 002).  24 32 002 24 32 002
|  |
Remove parking lock pawl, spring and shaft. Caution! Spring force. | 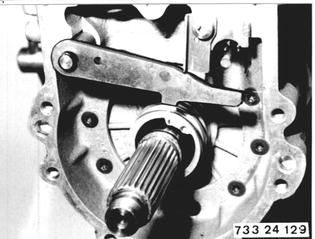 |
Apply Special Tool 24 1 010 on output shaft and secure with collar nut. | 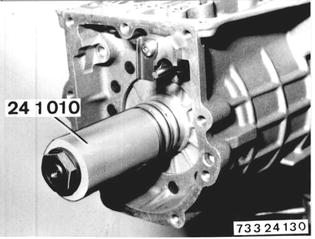 |
Unscrew Torx bolts with Special Tool 00 2 100. | 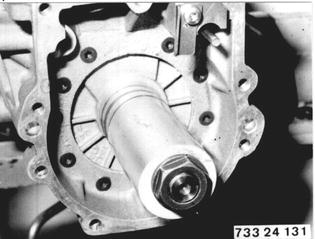 |
Set transmission upright. Disconnect converter bell housing and connecting plate. | 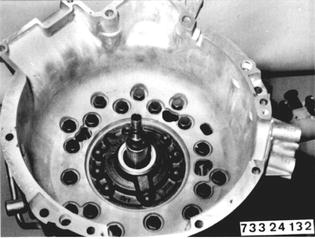 |
Take off angled washer (1), axial bearing (2) and thrust washer (3). | 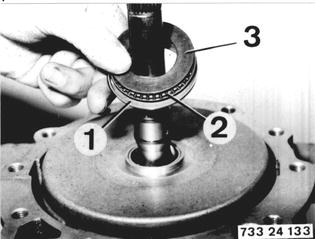 |
Remove input shaft with clutch A. | 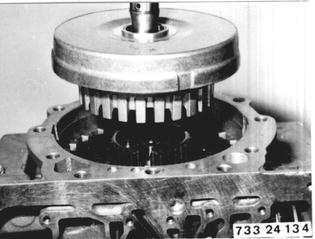 |
Remove plate carrier (4) for clutch A with angled washer (5), axial bearing (6) and thrust washer (7). |  |
Remove snap ring (8) with help of two screwdrivers. Installation: Replace snap ring (8). | 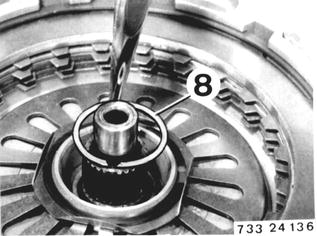 |
Pull out clutch B with two locally made hooks. Installation: Lift clutch until resistance is noticed and push back again. Pull out clutch with one firm pull. This will also pull out support (9) and seal (10). | 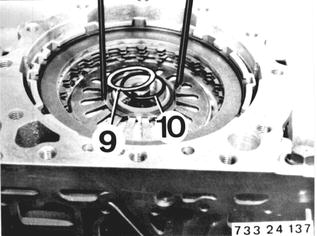 |
Sketch to make up hooks locally. Dimensions in mm. | 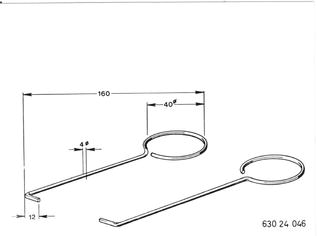 |
Lift out snap ring (11). | 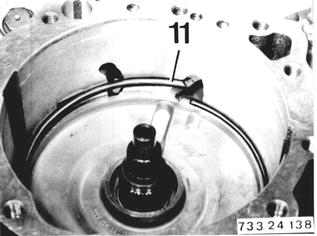 |
Apply Special Tool 24 0 040 on intermediate shaft. | 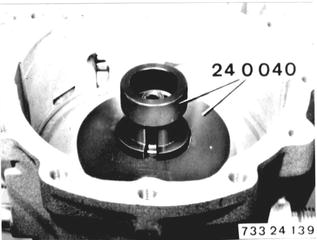 |
Pull out entire set. | 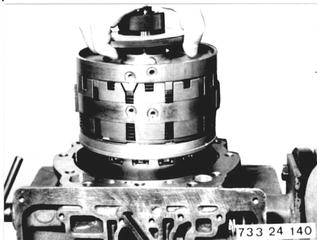 |
Remove angeld washer (12), axial bearing (13) and thrust washer (14). | 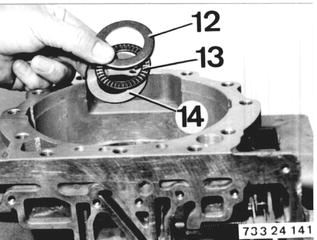 |
Remove 4th gear clutch set. |  |
B) Assembling: Install 4th gear clutch set. Guide clutch set into transmission case that 4 oil feed bores are aligned with bores in case. | 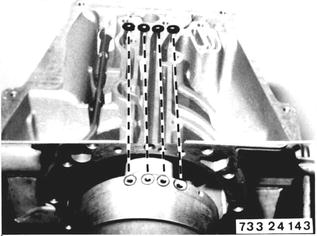 |
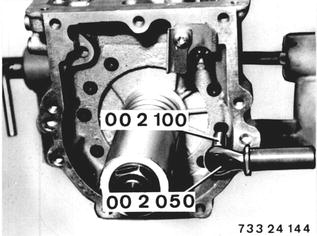
Bolt down clutch set with Special Tools 00 2 100 and 00 2 050. Tightening torque*.  * See Specifications * See Specifications
|  |
Set transmission upright. Insert thrust washer (3), axial bearing (2) and angled washer (1) with collar facing up. | 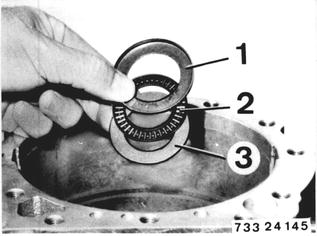 |
Place entire set in case. Four oil feed bores must be aligned with bores in case. Springs (1 and 2) must be in center of cylinder groove. | 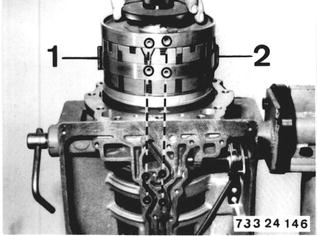 |
Insert snap ring (11). Remove Special Tool 24 0 040. | 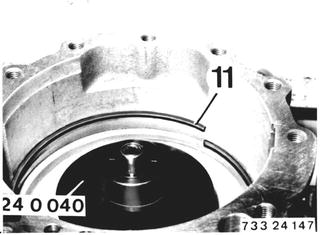 |
Insert and push clutch B against stop. | 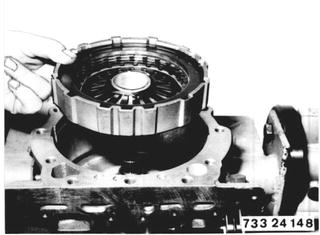 |
Install seal (10), support (9) and snap ring (8). | 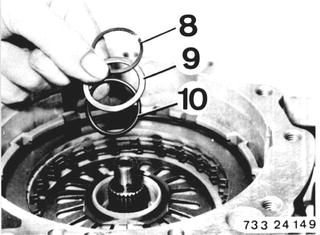 |
Insert plate carrier (4). Install thrust washer (7) and axial bearing (6). | 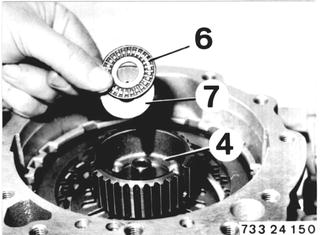 |
Paste angled washer (1) on cylinder A with grease (vaseline). | 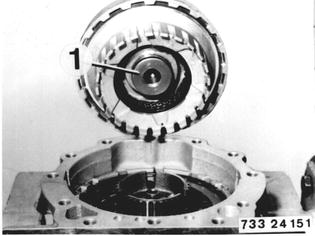 |
Insert clutch A and move it back and forth until splines of plate carrier and plates mesh. | 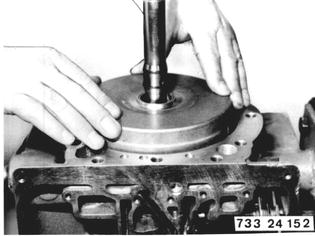 |
Install angled washer (3) with collar facing up and axial bearing (2). | 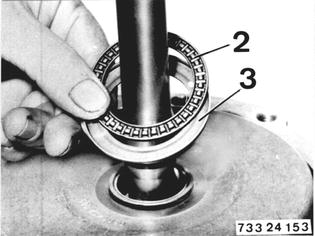 |
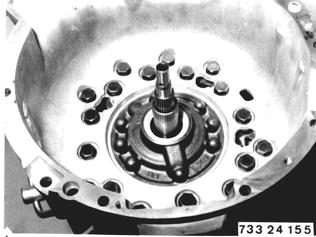
Paste on gasket and thrust washer (1) with grease (vaseline). | 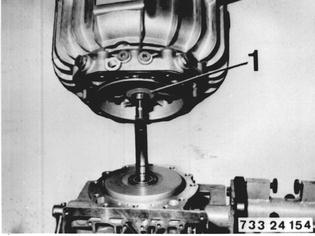 |
 |
|
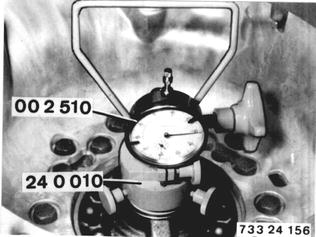
Check axial play of input shaft. Mount Special Tool 24 0 010 to hold input shaft. Apply Special Tool 00 2 510 (dial gauge). Check axial play be pulling input shaft. Specification: 0.2 to 0.4 mm (0.008 to 0.016´´). If play deviates, take off converter bell housing again and replace thrust washer with a thicker or thinner one. Recheck axial play. Bolt down converter bell housing. Tightening torque*.  * See Specifications * See Specifications
|  |
Remove Special Tool 24 1 010. | 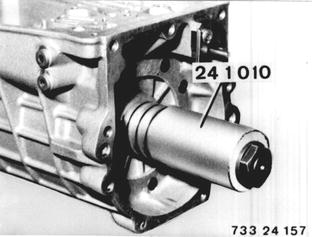 |
Install parking lock pawl. Attach return spring (1) in bore (2) of pawl. | 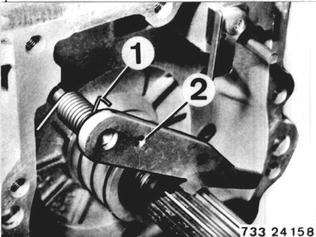 |
Lubricate O-ring (3) with ATF. Push on parking lock gear and governor. | 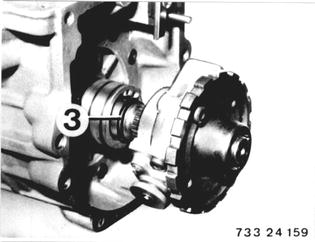 |
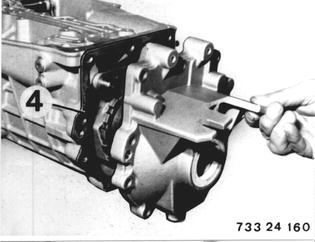
Hold gasket (4) in position with grease. Bolt on transmission extension. Tightening torque*.  * See Specifications * See Specifications
|  |
Install output flange. Screw on collar nut. Hold output flange with Special Tool 23 0 020. Tighten collar nut with Special Tool 23 1 210. Tightening torque*.  * See Specifications * See Specifications
|  |
Install lockplate and lock in groove. | 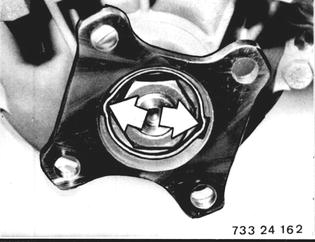 |
Install eight sealing sleeves. Press in sealing sleeves against stop. Be careful not to damage sealing sleeves. EH Transmission: Only install two sealing sleeves on cylinder F (output end). | 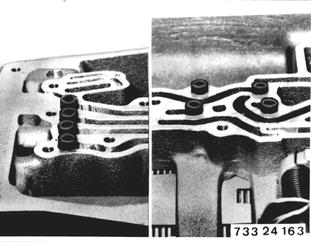 |
Install eight springs and eight circlips. Important! Install longer springs to face cylinder F (output end). EH Transmission: Install two springs only on cylinder F (output end). | 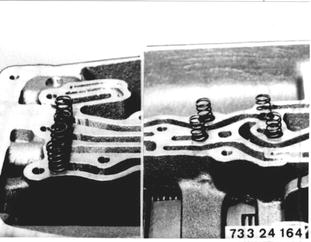 |
Note: Version with Improved Lubrication for Cylinder F Gear Set: Insert sealing sleeve (4) in bore (1) with tab facing oil bore. Press in sealing sleeve against stop with a suitable mandrel. Install spring and circlip. | 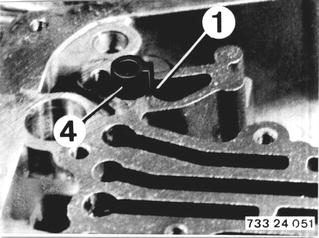 |
Mount valve body that selector valve can be connected in operating finger of pawl. This requires pulling throttle cable slightly, so that accelerator cam does not clamp on throttle pressure valve. | 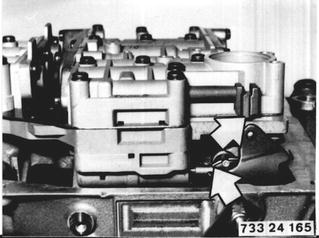 |
Screw in valve body mounting bolts. Important! Bolts differ in length. Bolts (1) = 65 mm (2.559´´). Bolts (2) = 60 mm (2.362´´). | 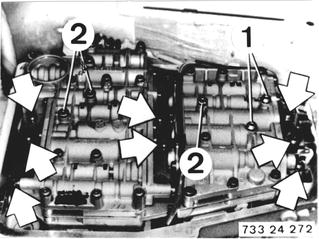 |
Tighten valve body bolts only finger tight. Align valve body with Special Tool 24 3 050. Distance between valve body case and throttle pressure piston must be 11.5 mm (0.453´´). | 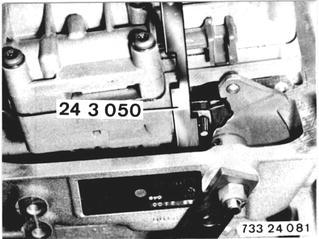 |
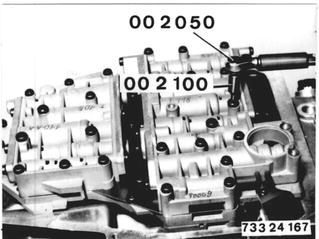
Tighten valve body bolts. Tightening torque*. Tighten bolts with Special Tools 00 2 100 and 00 2 050.  * See Specifications * See Specifications
|  |
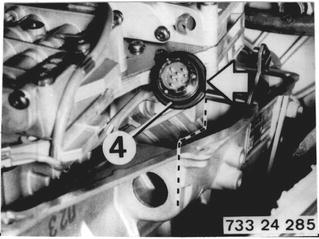
EH Transmission: Check O-ring (4), replacing if necessary. Install socket with the flat side facing out and bolt. Tightening torque*.  * See Specifications * See Specifications
|  |
Note: Also mount pulse transmitter on valve body. Engage tabe of holder (5) in grooves of plug. | 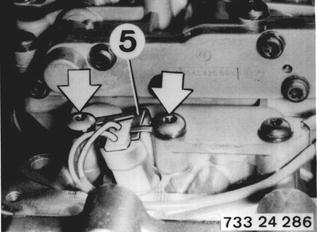 |
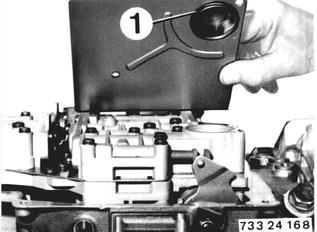
Install O-ring (1) between valve body and oil filter screen. Install and bolt down oil filter screen. Tightening torque*. Check length of bolts. Bolts with conical head = 65 mm long.  * See Specifications * See Specifications
|  |
Place magnets (1 and 2) in oil sump. Install gasket (3). | 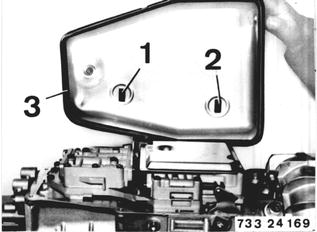 |
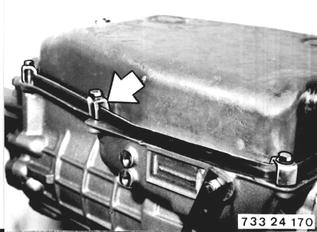
Install oil sump and tighten bolts with brackets. Tightening torque*. Important! Both brackets with straight, short legs must be mounted on straight side of the oil sump.  * See Specifications * See Specifications
|  |
BMW 628csi - M635csi (M6)»24 - Transmission-automatic»24 00 082 - Transmission - disassemble and assemble