Vehicles before change point in 1982 REPLACING FRONT AXLE CARRIER Remove and install front wheels 36 10 300. Detach steering gear at front axle carrier and tie up on brake booster. Installation: Tightening torque¹). Check front wheel alignment 32 00 034.  36 10 300 36 10 300 ¹) See Specifications ¹) See Specifications 32 00 034 32 00 034
| 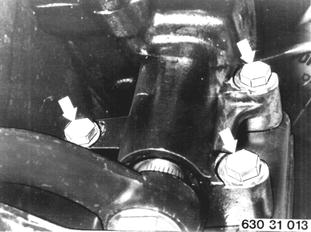 |
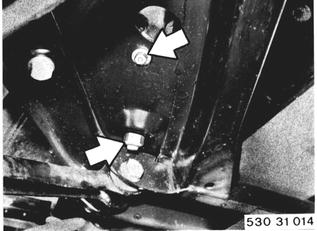
Unscrew nut on steering guide arm and bolt for heat shield. Installation: Tightening torque¹).  ¹) See Specifications ¹) See Specifications
|  |
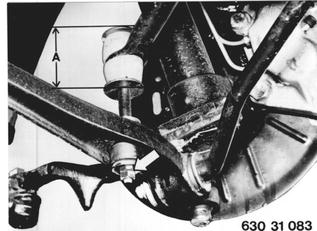
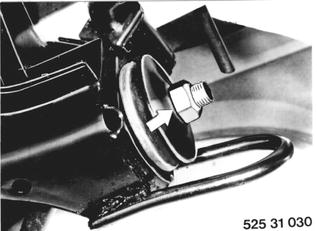
Detach stabilizer at control arm. Installation: Keep specified torque¹) at control arm and distance (A) on pad for stabilizer. Distance A = 60 mm (2.362´´) only for singlepiece rubber pad (also refer to 31 35 000).  ¹) See Specifications ¹) See Specifications 31 35 000 31 35 000
|  |
 |
|
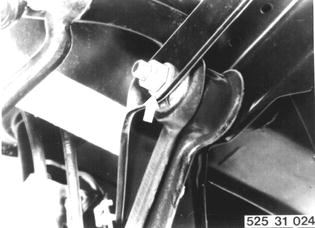
Detach left and right ends of cross member from front axle carrier and remove with strut. Installation: Tightening torque¹).  ¹) See Specifications ¹) See Specifications
|  |
Installation: Watch order of washers. | 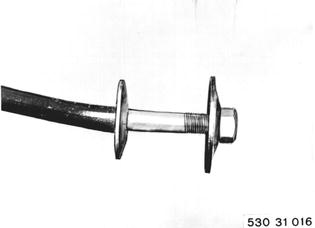 |
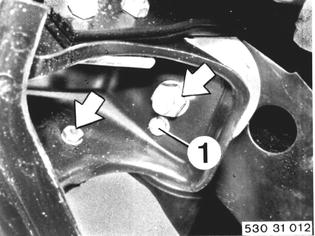
Detach left and right engine mounts. Also detach clamp for oil hoses of cars with automatic transmission. Installation: Tightening torque¹). Make sure shoulder (1) of engine mount engages in proper opening.  ¹) See Specifications ¹) See Specifications
|  |
Unscrew left and right stops. | 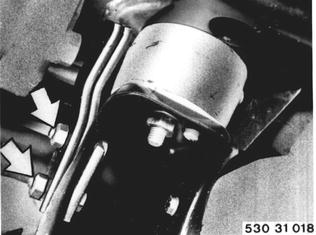 |
Suspend engine from overhead hoist with Special Tool 11 0 020. | 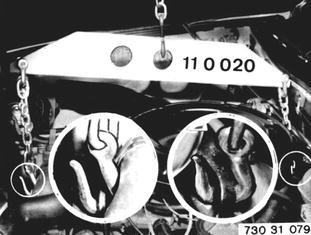 |
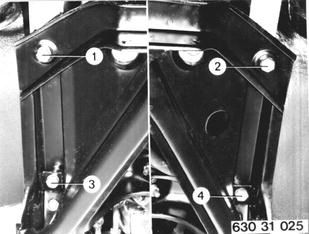 |
|
Lower front axle carrier and remove bolt for steering guide arm. Take off front axle carrier. Installation: Install steering guide arm prior to tightening new front axle carrier. | 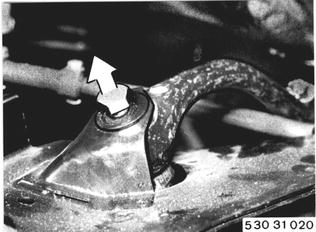 |
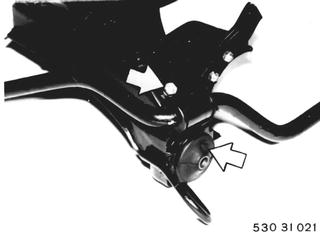
Transfer stabilizer to front axle carrier. Installation: Tightening torque¹). Transfer rubber mount in front axle carrier 31 12 531.  ¹) See Specifications ¹) See Specifications 31 12 531 31 12 531
|  |
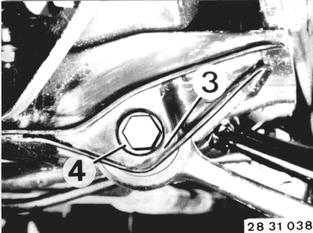
Vehicles after change point in 1982 REPLACING FRONT AXLE CARRIER Unscrew control arm on mount (3) on left and right sides. 4 = Washer (both sides) Installation: Replace self-locking nuts. Tightening torque* for a car in normal position*. Check front wheel alignment with an optical tester - see 32 00 034.  * See Specifications of Gr. 11/31/32 * See Specifications of Gr. 11/31/32 32 00 034 32 00 034
|  |
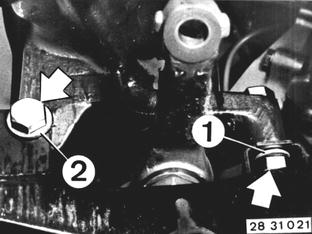
Unscrew steering gear mounting bolts (hold on nuts). 1 = Washer 2 = Washer (both sides) Suspend steering gear from car on a piece of wire. Lines remain connected. Installation: Replace self-locking nuts. Tightening torque*.  * See Specifications of Gr. 11/31/32 * See Specifications of Gr. 11/31/32
|  |
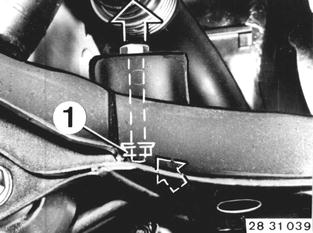
Unscrew heat shield. Unscrew steering guide arm. 1 = Washer Installation: Replace self-locking nut. Tightening torque*.  * See Specifications of Gr. 11/31/32 * See Specifications of Gr. 11/31/32
|  |
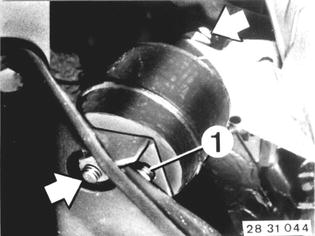
Unscrew engine mounts at bottom left and right. Loosen engine mount at top right. Installation: Check for correct installed position. Turning lock of mount fits in bore (1). Tightening torque*.  * See Specifications of Gr. 11/31/32 * See Specifications of Gr. 11/31/32
|  |
Attach Special Tool 00 0 200 on engine. Use chain and hooks of Special Tool 11 0 020. | 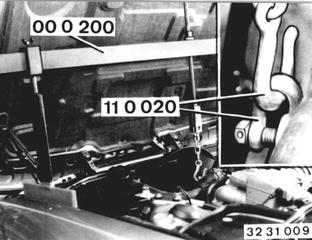 |
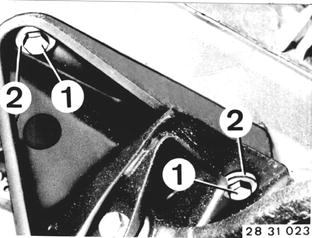
Unscrew engine carrier bolts (1). Remove front axle carrier from below. Installation. Install bolts with washers (2). Tightening torque*.  * See Specifications of Gr. 31 * See Specifications of Gr. 31
|  |