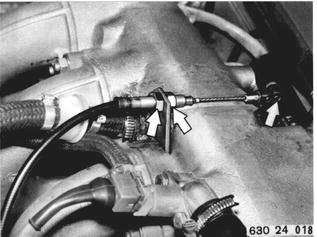
Vehicles before change point in 1982 REMOVING AND INSTALLING TRANSMISSION Disconnect accelerator cable and detach at counterholder. Installation: Adjust accelerator cable 24 00 004.  24 00 004 24 00 004
|  |
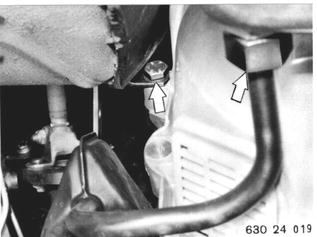
Remove exhaust assembly 18 00 020. Drain oil. Remove oil filler neck. Important: Never reuse drained oil. Installation: If oil smells burnt and is very black, the transmission must be disassembled. If oil is silver gray, this concerns aluminum or iron abrasion. In contradiction to iron abrasion, magnets will not hold aluminum. Important: If transmission is defective, clean oil cooler and lines with compressed air and then flush twice with ATF.  18 00 020 18 00 020
|  |
Version with Heat Shield: Detach heat shield at body. Disconnect guard (1) at propeller shaft. | 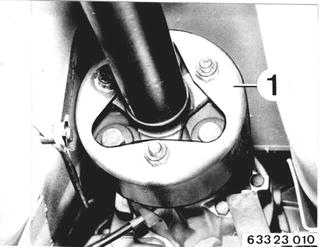 |
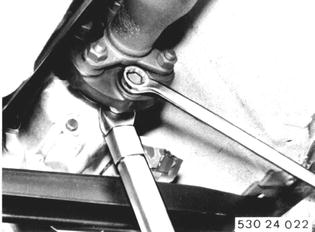
Detach propeller shaft at transmission. Loosen speedometer shaft. Detach selector rod (1). | 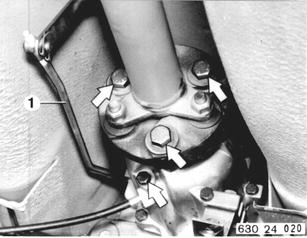 |
Installation: Tighten nuts to specified torque¹) with a standard 19 mm socket and torque wrench. Important: Only tighten nuts (never bolts) to prevent stress in coupling.  ¹) See Specifications ¹) See Specifications
|  |
Remove heat shield. Detach center bearing. Installation: Preload center bearing forward by 2 mm (0.080´´). | 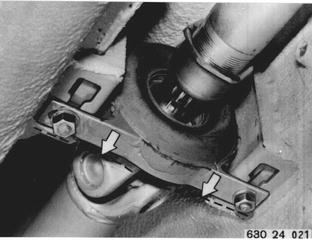 |
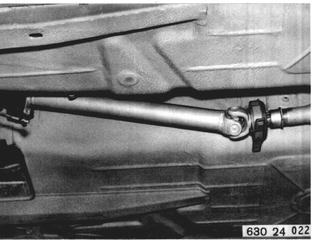
Push propeller shaft together at slide, bend down and pull off of centering pin. Installation: Align propeller shaft with Special Tool 26 1 000 (see 26 11 000).  26 11 000 26 11 000
|  |
Detach oil cooler lines and swing them to the right. | 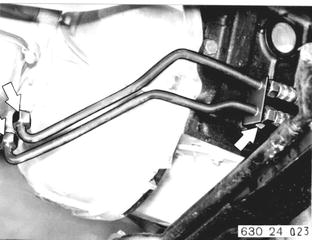 |
Remove guard (2). | 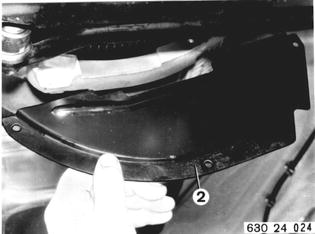 |
Loosen torque converter at drive plate at four points. Turn engine for this purpose. | 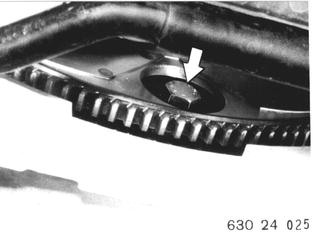 |
Support transmission with Special Tools 23 0 000 and 00 2 020. Remove cross member. Lower transmission to front axle carrier. Unscrew remaining transmission mounting bolts. | 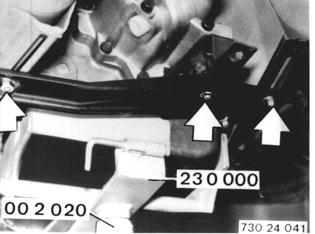 |
Lift off grill. Pull transmission off of engine and also press off torque converter. | 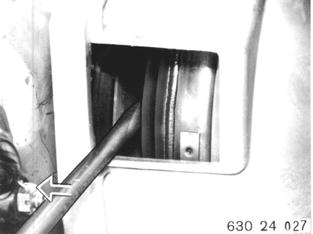 |
Important: Make sure torque converter is installed correctly before installing transmission. Drive dogs must be below edge of case by distance (A) of about 9 mm (0.354´´). | 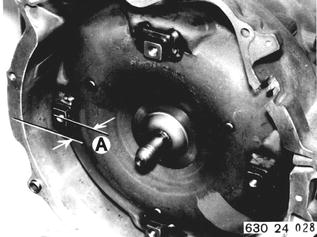 |
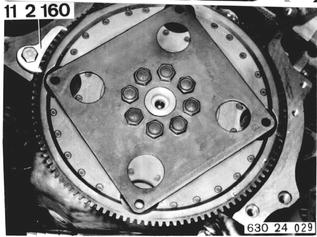
Installation: Check drive plate for breaks and cracks, replacing if necessary. Hold flywheel with Special Tool 11 2 160 when replacing. Unscrew stretch bolts. Important: Replace stretch bolts and install new ones with Loctite No. 270. Clean tapped bores thoroughly. Only paste thread. Torque valne¹).  ¹) See Specifications ¹) See Specifications
|  |
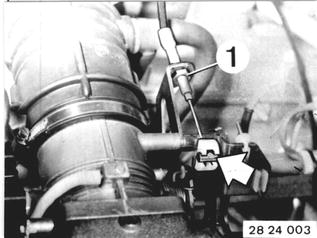
Vehicles after change point in 1982 REMOVING AND INSTALLING TRANSMISSION Disconnect battery ground lead. Unscrew nut (1). Disconnect accelerator cable. Installation: Adjust accelerator cable, see 24 00 004.  24 00 004 24 00 004
|  |
 |
|
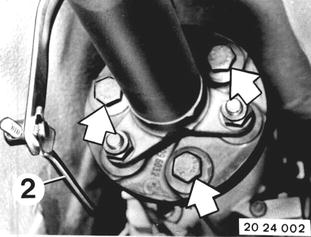
Installation: Replace stop nuts. Tighten nuts to correct torque* with a standard 19 mm socket and torque wrench. Important! Only tighten nuts (never bolts) to avoid stress in joint disc.  * See Specifications * See Specifications
|  |
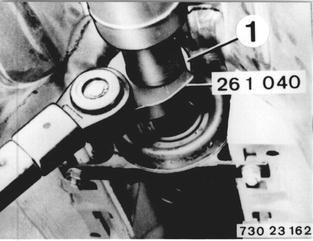
Loosen screw-on ring (1) several turns. Installation: Tighten screw-on ring with Special Tool 26 1 040 after finishing installation. Tightening torque*.  * See Specifications * See Specifications
|  |
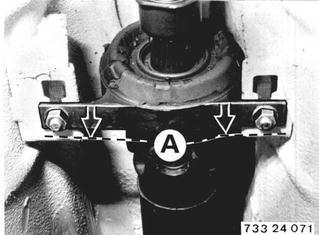
Unscrew center mount. Installation: Preload center mount forward by distance A = 2 to 4 mm (0.079 to 0.157´´). Tightening torque*. Bend propeller shaft down and pull off of centering pin. Important! Suspend propeller shaft from car on piece of wire.  * See Specifications * See Specifications
|  |
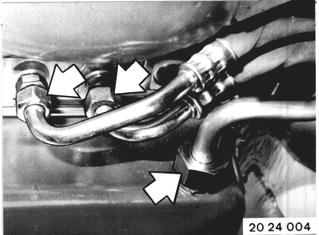
Drain oil. Important! Never reuse drained oil. Installation: Transmission will have to be disassembled, if oil smells burnt and is black. Important! If transmission was defective, clean oil cooler and lines with compressed air and flush twice with ATF. Remove oil filler tube. Disconnect oil cooler lines on transmission. Tightening torque*.  * See Specifications * See Specifications
|  |
Remove cover (2). |  |
Unscrew heat shield. Unscrew screws. Pull out speed sensor (1) and reference mark sensor (2). Important! Check installed position. Do not mix up plugs. Install speed sensor (1), black plug facing gear ring, and reference mark sensor (2), plug with gray ring (3) facing pin (4). Engine cannot be started, if plugs are mixed up. | 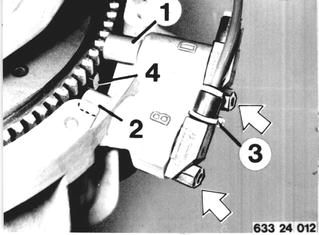 |
Installation: Check O-rings, replacing if necessary. Install sensors with Molykote Longterm 2. Important! Keep grease and dirt off of face of DME sensors. | 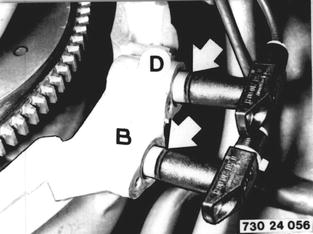 |
Disconnect torque converter on drive plate at four points. Tunr engine on vibration damper for this purpose. Tightening torque*.  * See Specifications * See Specifications
|  |
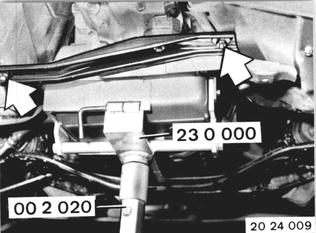
Support transmission with Special Tools 00 2 020 and 23 0 000. Unscrew cross member on body. Tightening torque*. Lower transmission to front axle carrier. Unscrew transmission on engine.  * See Specifications * See Specifications
|  |
Lift off grill. Pull transmission off of engine, pressing off torque converter at same time. Important! With transmission on hoist, latter must only be moved when lowered completely. |  |
Important! Make sure torque converter has correct installed position before installing transmission. Drive dogs must be below case edge by distance (A) = approx. 9 mm (0.354´´). |  |
Installation: Check drive plate for breaks and cracks, replacing if necessary. Hold flywheel with Special Tool 11 2 160. Unscrew expansion bolts. Important! Replace and install expansion bolts with Loctite No. 270**. Only coat threads. Clean tapped bores thoroughly. Tightening torque*.  * See Specifications * See Specifications ** Source: HWB ** Source: HWB
|  |
BMW 628csi - M635csi (M6)»24 - Transmission-automatic»24 00 020 - Transmission - removing and installing