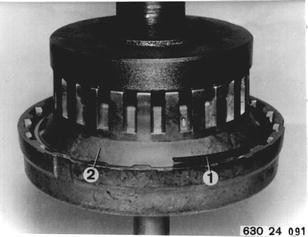
Vehicles before change point in 1982 REPLACING PLATE CLUTCHES AND BRAKES Disassemble transmission 24 00 080. Clutch A: Press clutch assembly together and remove snap ring (1). Remove plate carrier (2).  24 00 080 24 00 080
|  |
Lift out set of plates and diaphragm. | 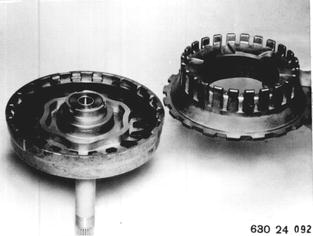 |
Remove plates. Installed Order: 1 Spring plates (two) 2 Outer plates (six) 3 Liner plates (five) 4 Plate carrier Installation: Place new liner plates in ATF having temperature of 70°C (160°F) for about 20 minutes. | 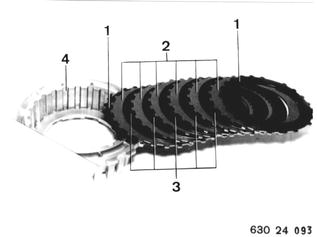 |
Place diaphragm in input shaft housing with concave side facing down. Install set of plates with plate carrier. Press clutch assembly together and install snap ring. |  |
Clutch B: Remove snap ring (1). Remove outer and liner plates. | 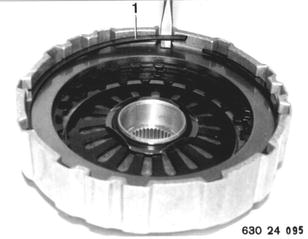 |
Remove plates. Installed Order: 1 Outer plates 1.8 mm (0.071´´) (four) 2 Liner plates (four) 3 End plate 4.5 mm (0.177´´) (one) 4 Housing Installation: Soak new liner plates in ATF having temperature of 70°C (160°F) for about 20 minutes. | 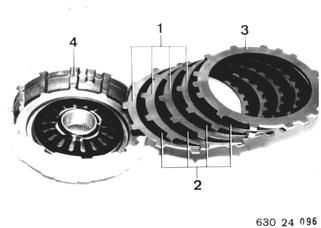 |
Clutch C´ To facilitate installation insert entire assembly in a pipe with an inside diameter of 29 mm (1.142´´) and clamp it in a vise. Remove centering plate (5). | 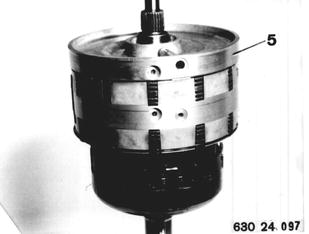 |
Remove outer plates (6), liner plates (7) and one-way clutch (8) for 2nd gear. Installation: Install one-way clutch (8) that bent tabs of retaining plate are visible from above. Installed Order: 6 Outer plates (two) 7 Liner plates (two) Soak new liner plates in ATF having temperature of 70°C (160°F) for about 20 minutes. | 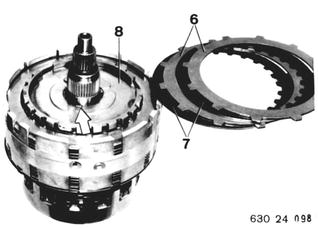 |
Clutch C: Remove snap ring (1). | 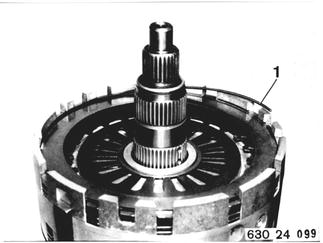 |
Remove plates. Installed Order: 2 Outer plates 1.8 mm (0.071´´) (two) 3 Liner plates (two) 4 End plate 4.5 mm (0.177´´) (one) Installation: Soak new liner plates in ATF having temperature of 70°C (160°F) for about 20 minutes. | 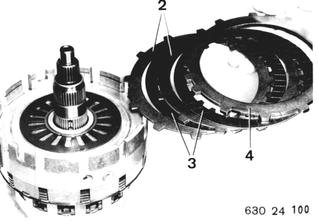 |
Clutch D Lift clutch body with clutch D off of set of planet gears. | 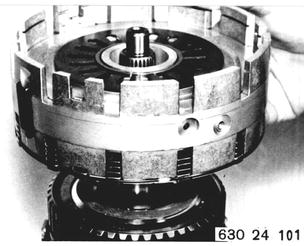 |
Remove snap ring (1). | 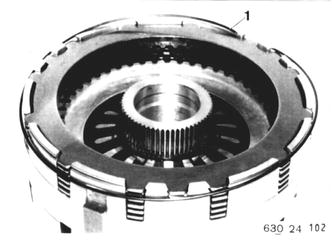 |
Remove plates. Installed Order: 2 Outer plates 1.8 mm (0.071´´) (four) 3 Liner plates (four) 4 End plate 4.5 mm (0.177´´) (one) Installation: Soak new liner plates in ATF having temperature of 70°C (160°F) for about 20 minutes. | 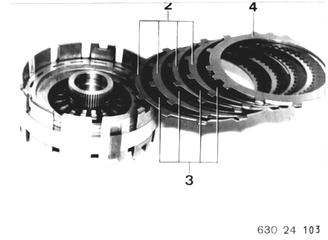 |
Vehicles after change point in 1982 REPLACING PLATE CLUTCHES AND BRAKES Disassemble transmission 24 00 080. Clutch A: Press out input shaft (1). Check O-ring (2), replacing if necessary.  24 00 080 24 00 080
| 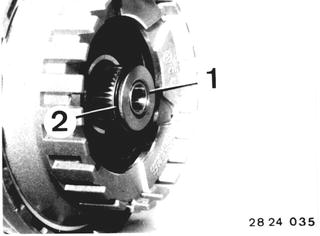 |
Compress clutch assembly and lift off circlip (3). Remove plate carrier (4). | 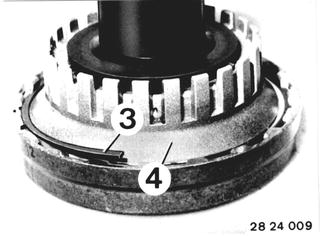 |
Lift out plate set and diaphragm spring. | 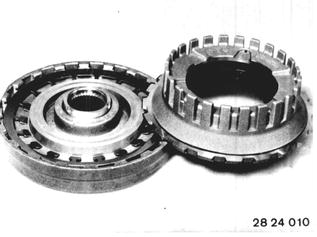 |
Press out piston for clutch A at oil bore with compressed air. | 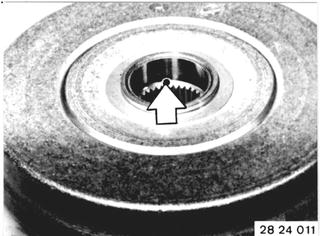 |
Installation: Replace O-rings (5 and 6). | 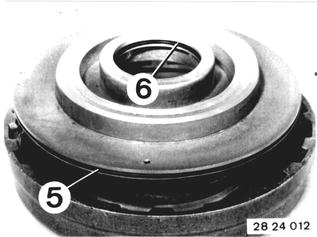 |
Remove plates. Installed Order: 1 Spring plates (two) 2 Outer plates (six) - 1.8 mm 3 Lined plates (five) 4 Plate carrier |  |
Place diaphragm spring in input shaft case with curved surface facing down. Install plate set with plate carrier. Compress clutch assembly and install circlip. |  |
Clutch B: Remove circlip (1). Remove outer and lined plates. |  |
Bend open lock plate (2). Push down spring diaphragm with Special Tool 24 2 030 and remove circlip (3). Installation: Replace and lock lockplate. Install diaphragm spring with curved surface facing up. | 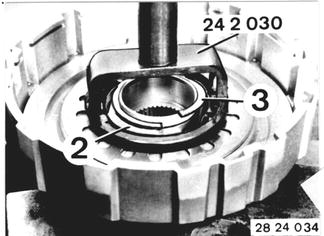 |
Press out piston for clutch B at oil bore with compressed air. | 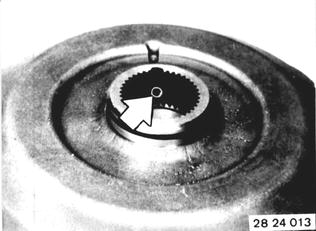 |
Installation: Check O-rings (4 and 5), replacing if necessary. | 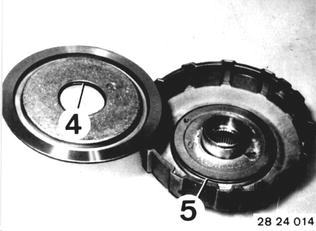 |
Installed Order: 1 Outer plates (four) - 1.8 mm 2 Lined plates (four) 3 End plate (one) - 4.5 mm Important! Install end plate with ground side facing lined plate. 4 Housing |  |
Clutch C´: To facilitate work place entire assembly in a pipe with an inside dia. of 29 mm (1.142´´) and clamp in a vise. Lift off centering plate (5). Remove outer and lined plates as well as one-way clutch. |  |
Push down diaphragm spring with Special Tool 24 2 030 and remove split retaining ring (1). Installation: Install diaphragm spring with curved surface facing up. | 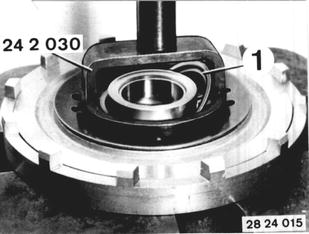 |
Press out piston for clutch C´ at oil bore with compressed air. Installation: Check O-rings (2 and 3), replacing if necessary. | 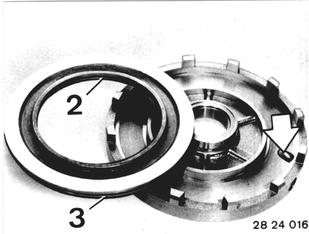 |
Installation: Install one-way clutch (8) that bent over tabs of retainer are seen from above. Installed Order of Plates: 6 Outer plates (two) - 1.8 mm 7 Lined plates (two) |  |
Clutch C: Remove outer and lined plates. | 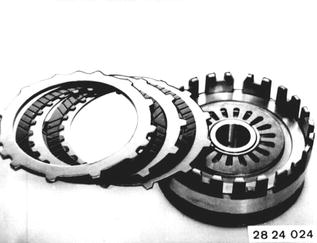 |
Push down on diaphragm spring with Special Tool 24 2 030 and remove split retaining ring (2). Installation: Install diaphragm spring with curved surface facing up. | 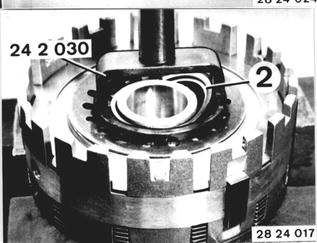 |
Press out piston for clutch C at oil bore with compressed air. Installation: Check O-rings (3 and 4), replacing if necessary. | 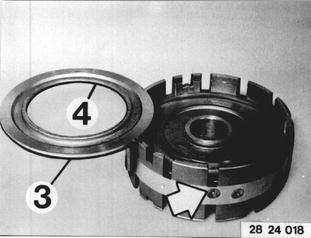 |
Installed Order: 2 Outer plates (two) - 1.8 mm 3 Lined plates (two) 4 End plate (one) - 4.5 mm Important! Install end plate with ground side facing lined plate. |  |
Clutch D: Remove clutch body with clutch D from planet gear set. |  |
Remove circlip (1). Remove outer and lined plates. |  |
Push down on diaphragm spring with Special Tool 24 2 030 and remove circlip (2). Installation: Install diaphragm spring with curved surface facing up. | 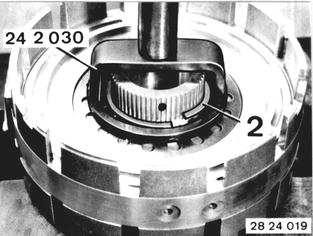 |
Press out piston for clutch D at oil bore with compressed air. Installation: Check O-rings (3 and 4), replacing id necessary. | 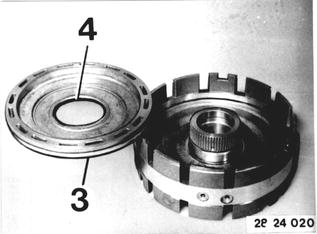 |
Installed Order: 2 Outer plates (four) - 1.8 mm 3 Lined plates (four) 4 End plate (one) - 4.5 mm Important! Install end plate with ground side facing lined plate. |  |
BMW 628csi - M635csi (M6)»24 - Transmission-automatic»24 23 020 - Plate clutches and brakes - replacing