Vehicles after change point in 1982 REPLACING TRANSFER PLATE -Transmission Removed - Remove torque converter - see 24 40 003. Mount transmission on Special Tool 24 0 150 in conjunction with an assembly stand. Caution! Only bolt down finger tight to avoid deforming the transmission case.  24 40 003 24 40 003
|  |
Unscrew converter bell housing wiht transfer plate. Only remove the inner bolts for this purpose. Only loosen the outer bolts. |  |
Lift off converter bell housing. Installation: Thrust washer (1), needle cage and angled washer. Note: The axial play of the input shaft can be adjusted with thrust washer (1). Replace gasket (2). |  |
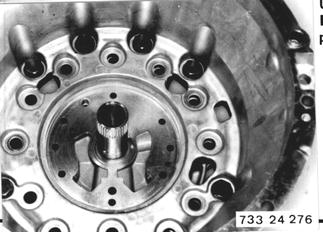
Remove primary pump (see 24 31 002). Unscrew bolts. Lift converter bell housing off of transfer plate.  24 31 002 24 31 002
|  |
A transfer plate with venting valve (2) is installed since Transm. No. 170 195. The venting valve provides faster pressure drop for clutch A. Only use transfer plates with a venting valve for repairs. Transfer plate (3) without venting valve. Transfer plate (4) with venting valve. | 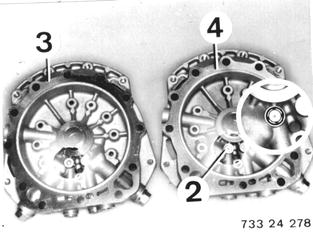 |
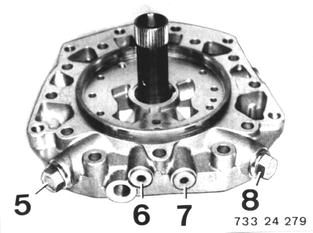
Transfer plugs (5 ... 8). Tightening torque*. Check seals, replacing if necessary.  * See Specifications * See Specifications
|  |
Bolt transfer plate on converter bell housing with outer bolts finger tight. Align bores for inner bolts. Install primary pump and check running with Special Tool 24 3 140. | 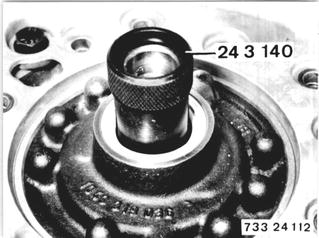 |
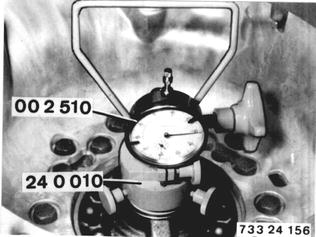
Mount converter bell housing and tighten all bolts with correct torque*. Check axial play of input shaft. Build up Special Tool 24 0 010 to hold the input shaft. Apply dial gage 00 2 510. Check axial play by pulling the input shaft. Specification: 0.2 to 0.4 mm (0.008 to 0.016´´). Remove converter bell housing again in case of deviation and replace thrust washer with a thicker or thinner one. Recheck axial play. Tighten converter bell housing to correct torque*.  * See Specifications * See Specifications
|  |