| |
RREPLACING REAR LEFT SIDE PANEL (PARTIAL
REPLACEMENT UP TO WHEELHOUSE) AND TAIL PANEL
Read "Introduction"!
Remove trunk mats, spare wheel cover, spare
wheel , tail panel trim, left and right side panel
trim, trunk lid seal, trunk lid lock, lock cylinder,
both tail lights, both license plate lights, wiring
as req., hoses at fuel level transmitter, exhaust,
tank, rear bumper, left and right buffer strips
and vent line.
| |
| |
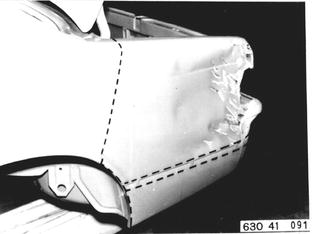
Cut through side panel along line.
|  |
| |
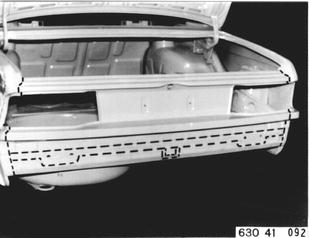
Cut through tail panel along line.
|  |
| |
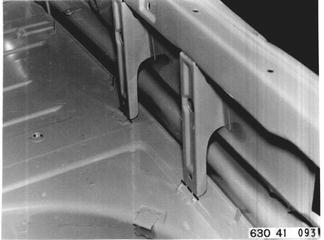
Cut off support.
|  |
| |
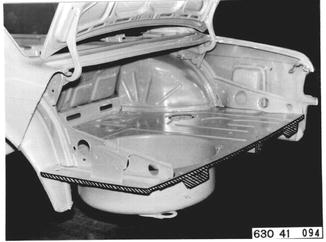
Remove scrap metal.
|  |
| |
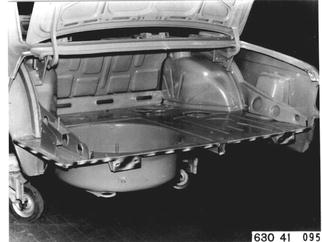
Align mating surfaces, grind both sides until
bright and coat with powdered zinc paint.
|  |
| |
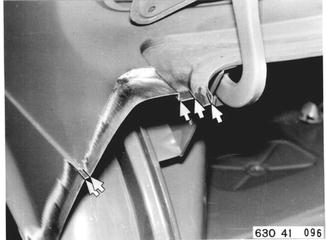
Saw cuts in edges.
|  |
| |
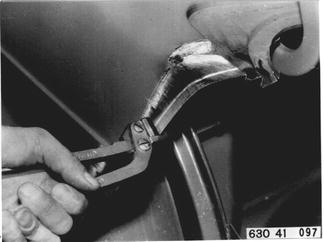
Shoulder remainder of side panel with a
shoulder pliers.
|  |
| |
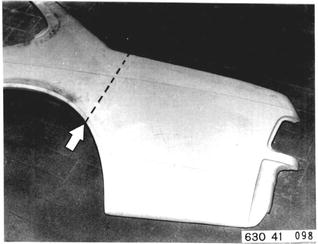
Cut off an appropriate piece of the new side
panel.
|  |
| |
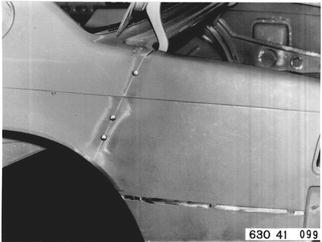
Fit section of side panel.
Grind both sides of mating surfaces until bright
and hold side panel in place.
|  |
| |
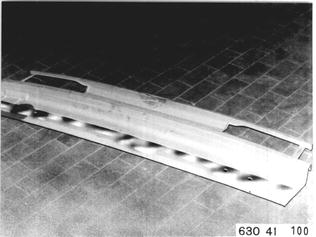
Grind both sides of new tail panel mating
surfaces until bright.
|  |
| |
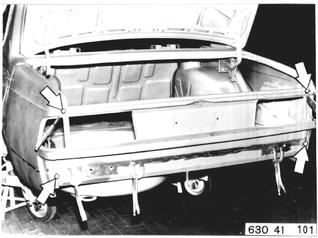
Fit and tack weld tail panel.
|  |
| |
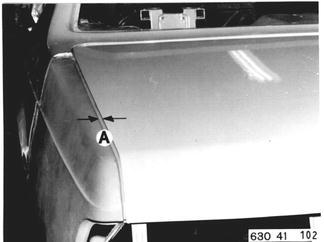
Check trunk lid gap (A).
|  |
| |
Spot weld side panel.
| 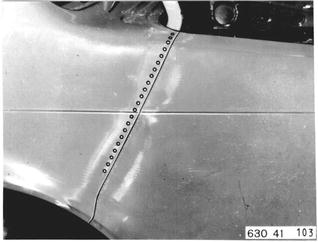 |
| |
Tack weld side panel with shielded arc
welder.
| 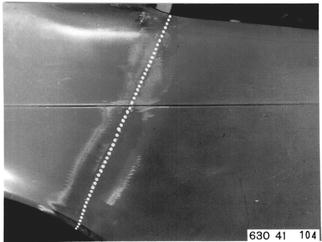 |
| |
Spot weld side panel to trunk floor plate.
| 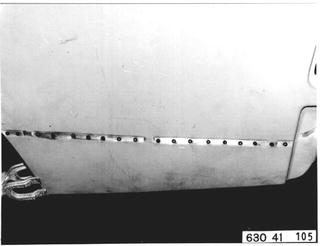 |
| |
Weld lock support.
| 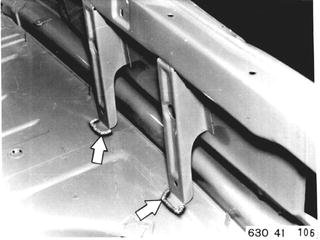 |
| |
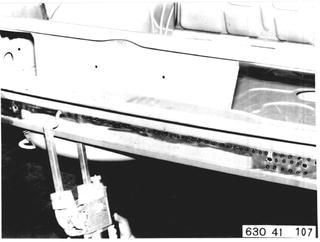
Spot weld tail panel to trunk floor plate.
|  |
| |
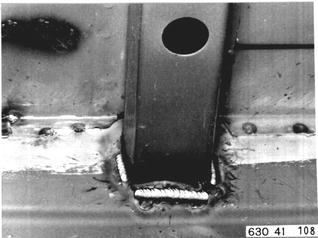
Weld trunk floor side member to tail panel
with shielded arc welder.
|  |
| |
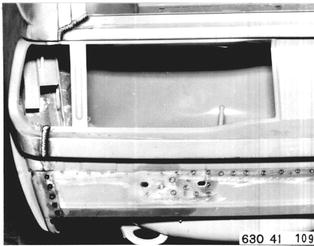
Weld tail panel to side panels.
|  |
| |
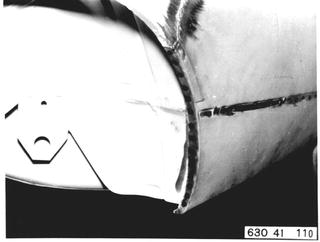
Spot weld side panel in wheel opening.
|  |
| |
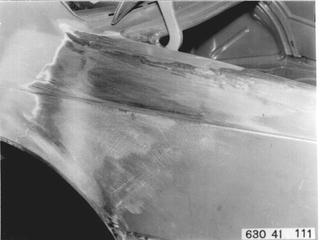
Tin side panel joint.
|  |
| |
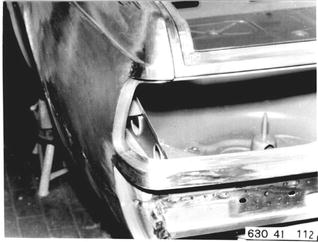
Tin both side panels at rear corner (trunk
lid joint) and lands underneath tail lights.
|  |
| |
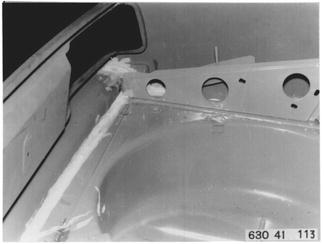
Coat joints with a joint sealing compound.
|  |
| |
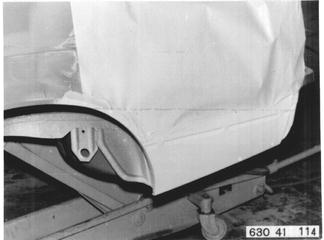
Spray wheelhouse and side panel with
Bodyplast.
|  |
| |
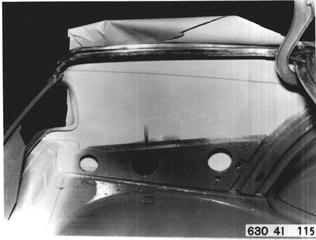
Spray inside of side panel with Bodyplast.
|  |
| |
Vehicles after change point in 1982
REPLACING LEFT REAR SIDE
PANEL (PARTIALLY UP TO
WHEEL HOUSE) AND TAIL
PANEL
Refer to information on page 41 - 001.
Remove trunk mat, spare wheel cover, spare
wheel, tail panel trim, left and right side panel
trim, trunk lid seal and lock, lock cylinder,
both tail lights, both license plate lights, wire
harness partially, hoses on level transmitter,
exhaust assembly, fuel tank, rear bumper, left
and right rubbing strips and vent line.
| |
| |
Cut off side panel along line.
Note:
Select cut in such a manner that rear window
must not be removed, not even for touch up
painting.
|  |
| |
Cut out tail panel along line.
|  |
| |
Cut off braces.
|  |
| |
Remove scrap metal.
|  |
| |
Straighten and grind both sides of mating
surfaces, and coat with zinc dust paint.
|  |
| |
Saw cuts in edges.
|  |
| |
Shoulder remaining piece of side panel with
a shouldering pliers.
|  |
| |
Cut off piece from new side panel to size.
|  |
| |
Fit in piece of side panel.
Grind both sides of mating surfaces and tack
weld on side panel.
|  |
| |
Grind both sides of mating surfaces on new
tail panel.
|  |
| |
Fit in and tack weld tail panel.
|  |
| |
Check trunk lid clearance (A).
|  |
| |
Spot weld side panel.
|  |
| |
Tack weld side panel with inert gas welder.
|  |
| |
Spot weld side panel on trunk floor plate.
|  |
| |
Weld lock supports.
|  |
| |
Spot weld tail panel on trunk floor plate.
|  |
| |
Inert gas weld trunk floor plate side member
on tail panel.
|  |
| |
Weld tail panel on side panels.
|  |
| |
Spot weld side panel in wheel opening.
|  |
| |
Tin out side panel connection.
|  |
| |
Tin out both side panels at rear corner (trunk
lid connection) and strips underneath tail lights.
|  |
| |
Coat joints with joint sealing compound.
|  |
| |
Spray out wheel house and side panel with
anti-drumming compound.
|  |
| |
Spray out inside of side panel with
antidrumming compound.
|  |