| |
REPLACING WHEELHOUSE OUTER SECTION
AND REAR LEFT SIDE PANEL (PARTIAL REPLACEMENTS)
Read "Introduction"!
Remove rear window, trunk lid, trunk lid lock,
trunk lid rubber seal, lock cylinder, tail lights,
both rear seats, center armrest, side trim, seat
belt, B-pillar trim, waistline strip, inner window
strip, headrests with holders and trim, side
window and regulator, window guide rails,
striker, inner entrance reil, guard strips, outer
B-pillar plate, edge guard and seal for door,
entrance rail plate, door pillar, entrance
rail strip, tank flap, trunk mats, spare wheel,
tail and side panel trim, rear rain molding and
rear wheel.
Detach exhaust, carpets and headliner as
required.
| |
| |
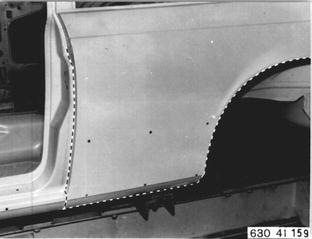
Cut through side panel along line.
|  |
| |
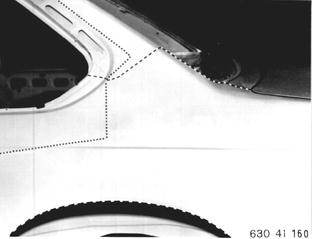
Cut through side panel along line.
Important: Cut must be made between upper
and lower reinforcement.
Note replacement part if in doubt.
|  |
| |
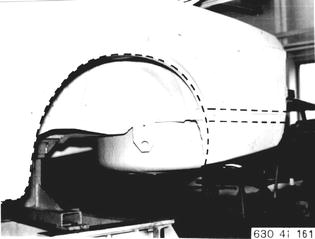
Cut through side panel along line.
|  |
| |
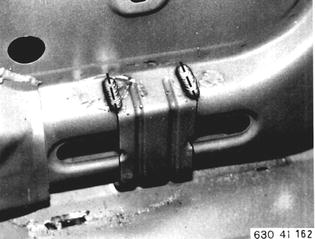
Bend down side panel and cut off car jack
reinforcement.
Remove side panel.
|  |
| |
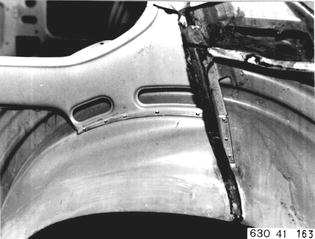
Drill welding spots on support.
|  |
| |
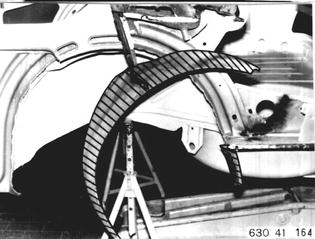
Cut through wheelhouse outer section
about 20 mm (3/4´´) toward outside of
spot weld edge.
|  |
| |
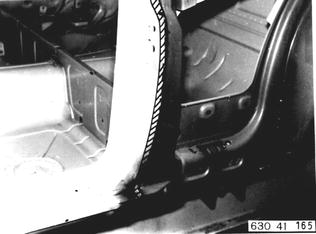
Remove scrap metal.
|  |
| |
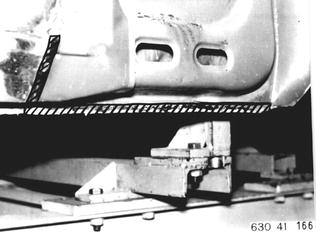
Remove scrap metal.
|  |
| |
Remove scrap metal.
|  |
| |
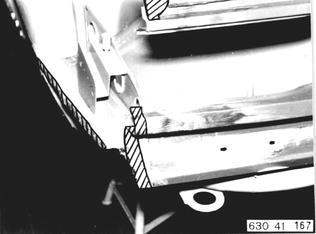
Align mating surfaces and grind bright on
both sides.
|  |
| |
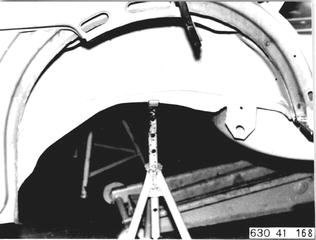
Cut off new wheelhouse along edge that it
will overlap by about 15 mm (0.590´´).
Grind both sides of mating surfaces bright and
coat with powdered zinc paint.
|  |
| |
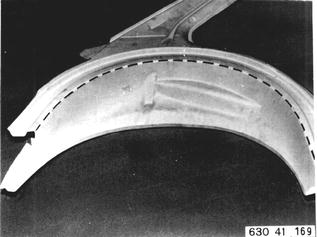
Fit new wheelhouse outer section, using the
side panel to find the exact location of
wheelhouse outer section.
Tack weld wheelhouse outer section.
|  |
| |
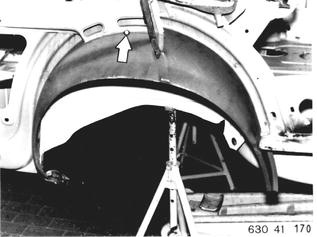
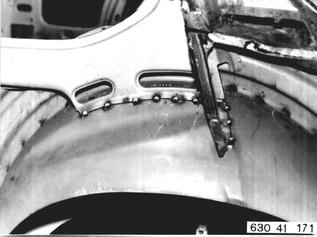
Shield arc weld support to wheelhouse.
|  |
| |
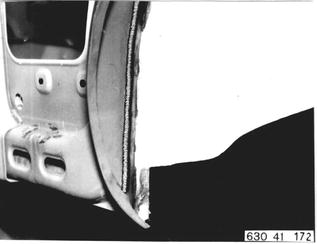
Shield arc weld inside of wheelhouse.
|  |
| |
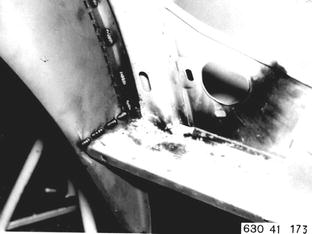
Tack weld wheelhouse on outside and to
trunk floor plate.
|  |
| |
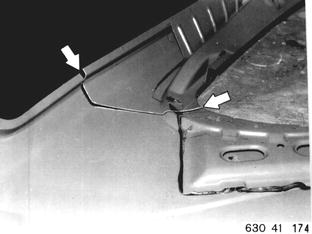
Cut off new side panel in area of C-pillar
that it will overlap by about 10 ... 15 mm
(0.394 ... 0.590´´).
Important: Cut must be made between upper
and lower reinforcement.
|  |
| |
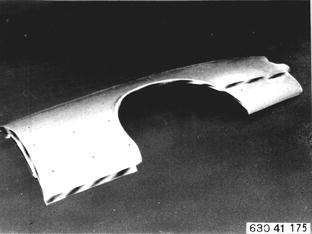
Grind both sides of new side panel mating
surfaces until bright.
|  |
| |
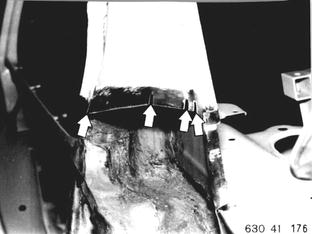
Prepare C-pillar for overlapping.
Grind mating surfaces until bright and make cuts
in edges.
|  |
| |
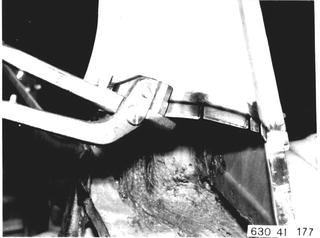
Shoulder mating surfaces in area of C-pillar
with a shoulder pliers.
|  |
| |
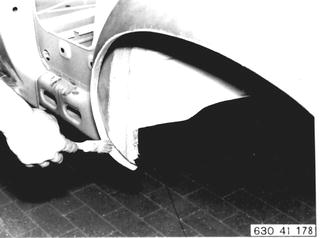
Grind all side panel mating surfaces until
bright and coat with powdered zinc paint.
|  |
| |
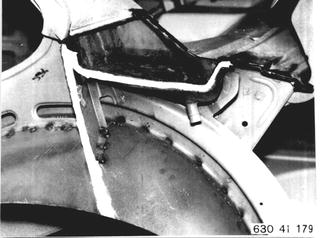
Apply a coat of joint sealing compound to
bearing surfaces in area of water drain box.
|  |
| |
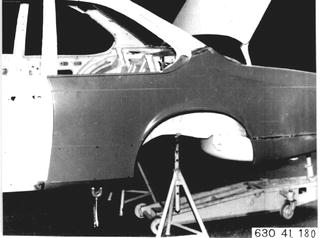
Guide in side panel and hold in place with
body pliers.
|  |
| |
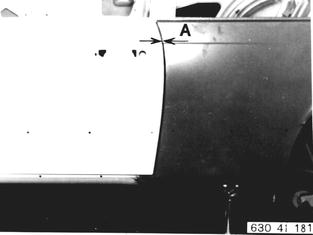
Check door gap (A).
Align side panel if necessary.
|  |
| |
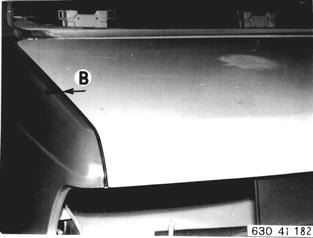
Check trunk lid gap (B).
Align side panel if necessary.
|  |
| |
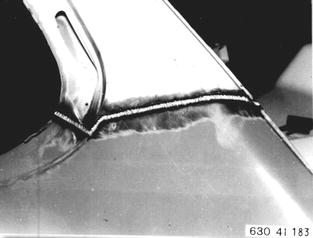
Shield arc weld side panel in area of C-pillar.
Important: Don´t conduct too much heat
into side panel to prevent destruction of seals.
|  |
| |
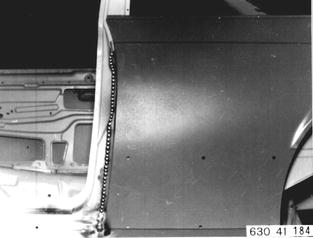
Shield arc weld side panel in area of B-pillar.
|  |
| |
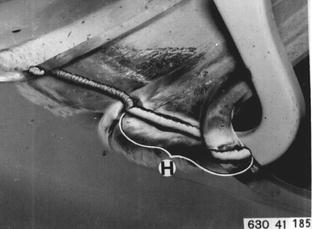
Shield arc weld side panel to rear window
frame or braze in area (H).
|  |
| |
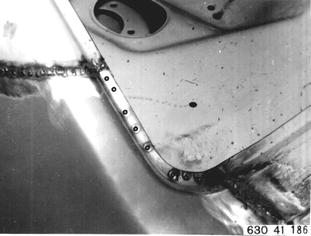
Spot weld side panel in area of rear window
opening.
|  |
| |
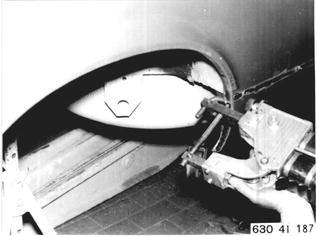
Spot weld side panel in area of wheelhouse.
|  |
| |
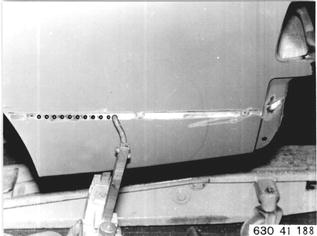
Spot weld side panel to trunk floor plate.
|  |
| |
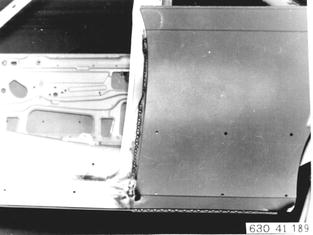
Spot weld side panel in area of entrance rail.
|  |
| |
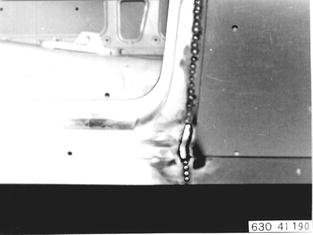
Shield arc weld or braze side panel in area of
entrance rail.
|  |
| |
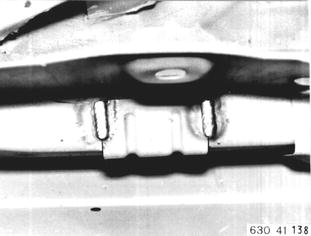
Shield arc weld car jack holder reinforcement.
|  |
| |
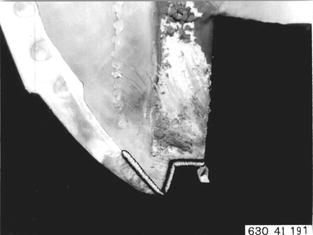
Gas weld bottom edge of side panel/wheelhouse.
|  |
| |
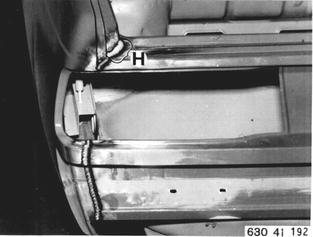
Shield arc weld side panel to tail panel.
Braze in area (H).
|  |
| |
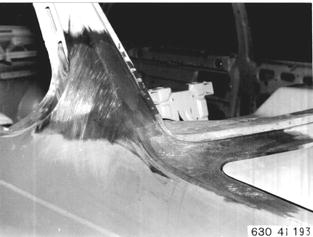
Tin joints of side panel in area of C-pillar and
rear window frame.
|  |
| |
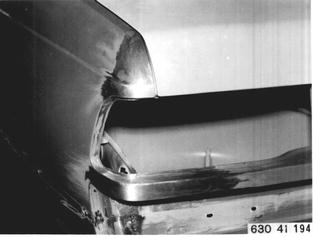
Tin side panel/trunk lid joints and land
underneath tail lights.
|  |
| |
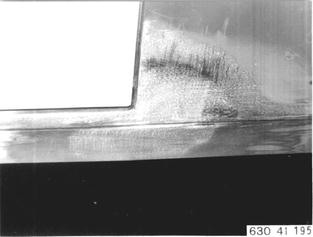
Tin side panel/entrance rail joints.
|  |
| |
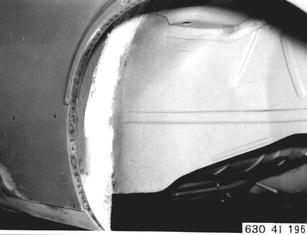
Grind and clean all welding seams.
Seal welding seam on inside and outside of
wheelhouse with a joint sealing compound.
|  |
| |
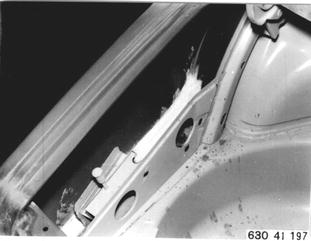
Coat joint between trunk floor plate and side
panel with a sealing compound for joints.
|  |
| |
Spray inside of wheelhouse and side panel in
trunk with Bodyplast.
|  |
| |
Vehicles after change point in 1982
REPLACING LEFT REAR
WHEEL HOUSE OUTSIDE
PANEL AND SIDE PANEL
(PARTIAL REPLACEMENTS)
Refer to information on page 41 - 001.
Remove rear window, trunk lid, trunk lid lock,
trunk lid rubber seal, lock cylinder, tail lights,
both licence plate lights, rear bumper, fuel
tank, both rear seats, center armrest, side
trim panel, seat belt, B pillar trim, shoulder
plate, inside window cover plate, headrests
with holders and trim, side window complete
with regulator, window guide rails, striker,
inside entrance strip, rubbing strips, outside B
pillar plate, door edge guard and weatherstrip,
entrance plate, fuel tank flap, trunk mat, spare
wheel, tail panel trim and exhaust.
Detach carpet and roof liner as required.
| |
| |
Cut out side panel along line.
|  |
| |
Cut out side panel along line.
Important!
Cut must run between upper and lower
reinforcement.
Refer to spare part when in doubt.
Note:
Select cut between window line and roof joint
in such a manner, that paint in area of C pillar
can be touched up.
|  |
| |
Cut out side panel along line.
|  |
| |
Bend side panel down and cut off car jack
reinforcement.
Remove side panel.
|  |
| |
Drill off welding spots on support.
|  |
| |
Cut off wheel house outside panel (approx.
20 mm/0.787´´ from spot welding edge to
outside).
|  |
| |
Remove scrap metal.
|  |
| |
Remove scrap metal.
|  |
| |
Remove scrap metal.
|  |
| |
Straighten and grind both sides of mating
surfaces.
|  |
| |
Cut off new wheel house along edge to have an
overlap of approx. 15 mm (0.591´´).
Grind mating surfaces on both sides and coat
with zinc dust paint.
|  |
| |
Fit in new wheel house outside panel, locating
position of wheel house outside panel precisely
with the side panel.
|  |
| |
Inert gas spot weld support on wheel house.
|  |
| |
Inert gas weld wheel house on inside.
|  |
| |
Tack weld wheel house on outside and on
trunk floor plate.
|  |
| |
Cut off new side panel in area of C pillar to
have an overlap of 10 to 15 mm (0.394 to
0.591´´).
Important!
Cut only possible between upper and lower
reinforcements.
|  |
| |
Grind both sides of mating surfaces on new
side panel.
|  |
| |
Prepare C pillar for overlapping.
Grind mating surface and make cuts in edges.
|  |
| |
Shoulder mating surface in area of C pillar with
a shouldering pliers.
|  |
| |
Grind down and coat all mating surfaces for
side panel with zinc dust paint.
|  |
| |
Apply coat of joint sealing compound on bearing
surfaces in area of water drain tray.
|  |
| |
Guide in and clamp side panels with body
pliers.
|  |
| |
Check door clearance (A).
Adjust side panel, if necessary.
|  |
| |
Check trunk lid clearance (B).
Correct side panel, if necessary.
|  |
| |
Inert gas weld side panel in area of C pillar.
Important!
Do not conduct too much heat into side panel
to avoid destruction of seals.
|  |
| |
Inert gas weld side panel in area of B pillar.
|  |
| |
Inert gas weld side panel on rear window frame
and braze in area (H).
|  |
| |
Spot weld side panel in area of rear window
opening.
|  |
| |
Spot weld side panel in area of wheel house.
|  |
| |
Spot weld side panel on trunk floor plate.
|  |
| |
Spot weld side panel in area of entrance.
|  |
| |
Inert gas spot weld and braze side panel in
area of entrance.
|  |
| |
Inert gas weld reinforcement for car jack
take-up.
|  |
| |
Autogen weld lower edge of side panel/wheel
house.
|  |
| |
Inert gas weld side panel and tail panel.
Braze in area (H).
|  |
| |
Tin out connections of side panel in area of
C pillar and rear window frame.
|  |
| |
Tin out connection between side panel and
trunk lid as well as panel underneath tail lights.
|  |
| |
Tin out side panel/entrance connection.
|  |
| |
Grind down and clean all welding seams.
Apply coat of joint sealing compound on
welding seam between wheel house inside and
outside panels.
|  |
| |
Coat joint between trunk floor plate and side
panel with joint sealing compound.
|  |
| |
Spray coat of anti-drumming compound on
inside of wheel house and on side panel in
trunk.
|  |