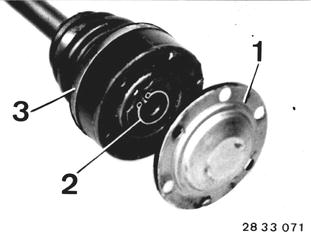
Vehicles after change point in 1982 REPLACING DUST COVER Remove and install output shaft 33 21 000. Remove sealing cover (1). Remove circlip (2). Unscrew clamp on dust cover. Take off dust cover. Press off cover (3).  33 21 000 33 21 000
|  |
Press output shaft out of constant velocity joint. | 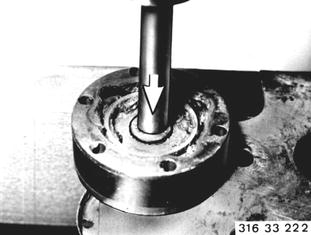 |
Important! Bearing inner race must be on counterpressure plate (P). Do not disassemble joint. Check joint for dirt or damage. | 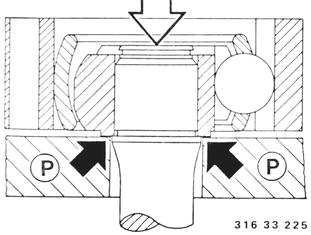 |
Place dust cover and inside cover on output shaft. Joint must be installed with collar on inner race facing output shaft. Important! Use repair kit. | 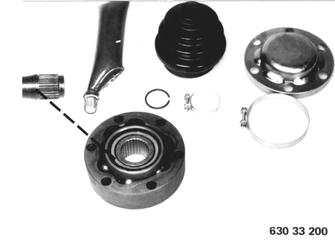 |
Clean threads of joint to remove grease. Coat threads with Loctite No. 270. Caution! Keep Loctite out of ball passages. | 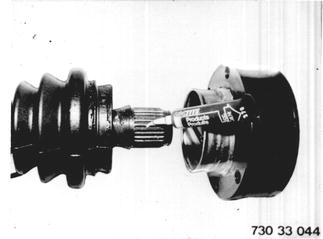 |
Press on joint with cap and install circlip. Installation: If only one side is disassembled, the sealing cover of the other side has to be removed to press on the joint. |  |
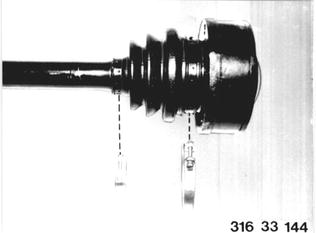
Pack joint and dust cover with grease*. Clean sealing surface for dust cover to remove grease. Coat large diameter end of dust cover with an adhesive* and secure with new clamps. Seal the sealing cover with Curil and install.  * See Specifications * See Specifications
|  |