REMOVING AND INSTALLING CHAIN TENSIONER PISTON Unscrew plug. Important: Strong spring pressure. Remove spring and piston. | 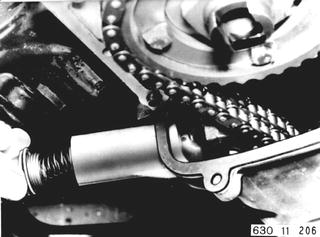 |
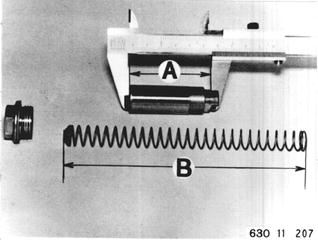
Installation: Check piston installed distance A¹) and relaxed spring length B¹). Tapered end of spring faces plug.  ¹) See Specifications ¹) See Specifications
|  |
Apply pneumatic air to check vent slots (1) for plugging. Press out valve and clean slots, if they are plugged. Installation: Don´t cover vent slots with perforated disc. | 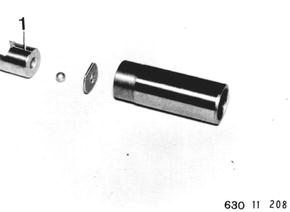 |
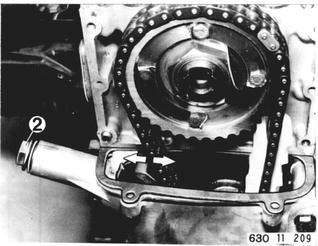
To bleed piston, remove cylinder head cover 11 12 000. Install piston and spring. Install plug and tighten only slightly. Fill oil pocket with engine oil. Move tensioning rail back and forth with screwdriver until oil runs out at plug (2). The following could cause unusual chain noise: a) Piston bled insufficiently. b) Piston seized. c) Vent slots plugged. d) Ball valve in piston malfunctions. e) Spring force too high or too low. f) Installed piston distance incorrect.  11 12 000 11 12 000
|  |
Vehicles after change point in 1982 REMOVING AND INSTALLING CHAIN TENSIONER PISTON Unscrew plug (1). Caution! Strong spring force. Remove spring and piston. Installation: Replace seal (2). | 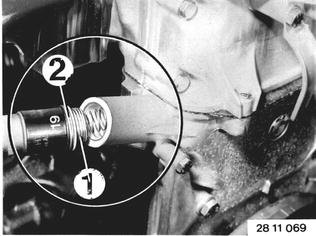 |
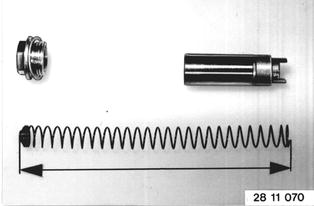 |
|
Checking Piston: Shake to check whether ball (3) moves easily. Check operation of valve by blowing in air. - in direction A - closed - in direction B = open If necessary, drive out and clean valve (4) in sleeve (5). Are vent slots (6) clogged? | 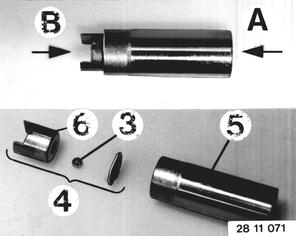 |
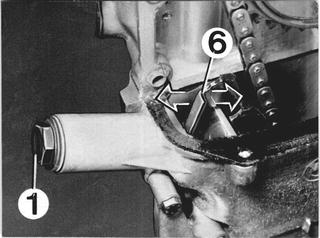
Remove cylinder head cover (see 11 12 000) to bleed the piston. Loosen plug (1) and move tensioning rail (6) back and forth until oil escapes past plug (1) and resistance is noticed. Causes for Unusual Chain Noise: a) Piston bled insufficiently b) Piston seized c) Vent slots clogged d) Ball valve in piston not working e) Spring force excessive or insufficient  11 12 000 11 12 000
|  |