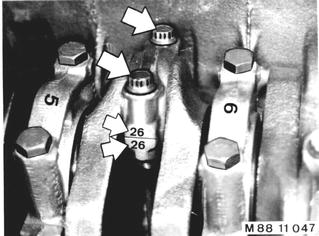
Vehicles after change point in 1982 REMOVING AND INSTALLING PISTON - Engine Removed - Remove cylinder head 11 12 100. Remove oil pump 11 41 000. Take off connecting rod bearing cap and press out piston with connecting rod upwards. Installation: Install connecting rod 11 24 571.  11 12 100 11 12 100 11 41 000 11 41 000 11 24 571 11 24 571
|  |
||||||
Remove circlip (1). Press out piston pin. Installation: Piston pins and pistons are matched and must not be mixed up. | 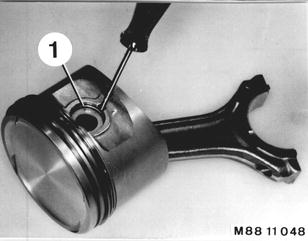 |
||||||
Installation: Pairing codes and grooves of bearing shells are on exhaust side. Install circlip (1) with gap facing down. | 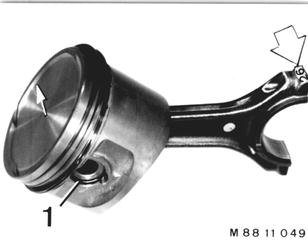 |
||||||
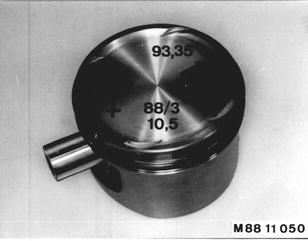
Only install a psiton of same make and same weight class. Weight class is stamped with "+" or "-" in piston crown. Identification:
Check machined size (piston diameter)*.  * See Specifications * See Specifications
|  |
||||||
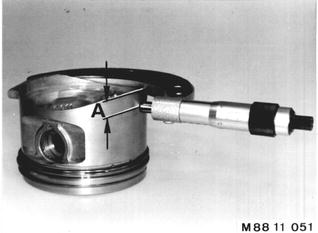
Measuring Piston Installed Clearance: Measure piston diameter* at measuring point "A" with a micrometer.
 * See Specifications * See Specifications
|  |
||||||
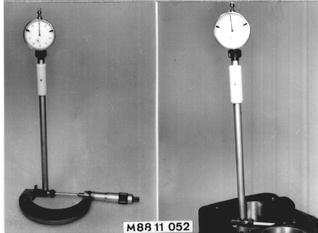
Set internal calipers to zero on micrometer with the measured piston diameter. Measure cylinder bore with internal calipers at bottom, center and top in forward and rotational directions. Compare measured piston installed clearance with specified piston installed clearance*. Max. permissible wear clearance*.  * See Specifications * See Specifications
|  |
||||||
Bolt Special Tool 11 2 060 on connecting rod. Lubricate piston and piston rings with oil. Offset piston ring end gaps by 120°. Compress piston rings with Special Tool 11 2 270. | 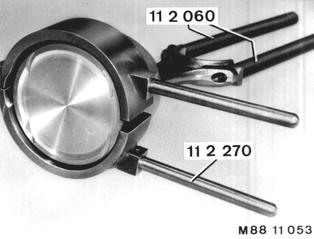 |
||||||
Install piston that arrow faces timing chain. Turn pertinent connecting rod bearing journal to BDC to install piston. | 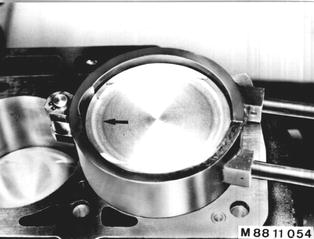 |